
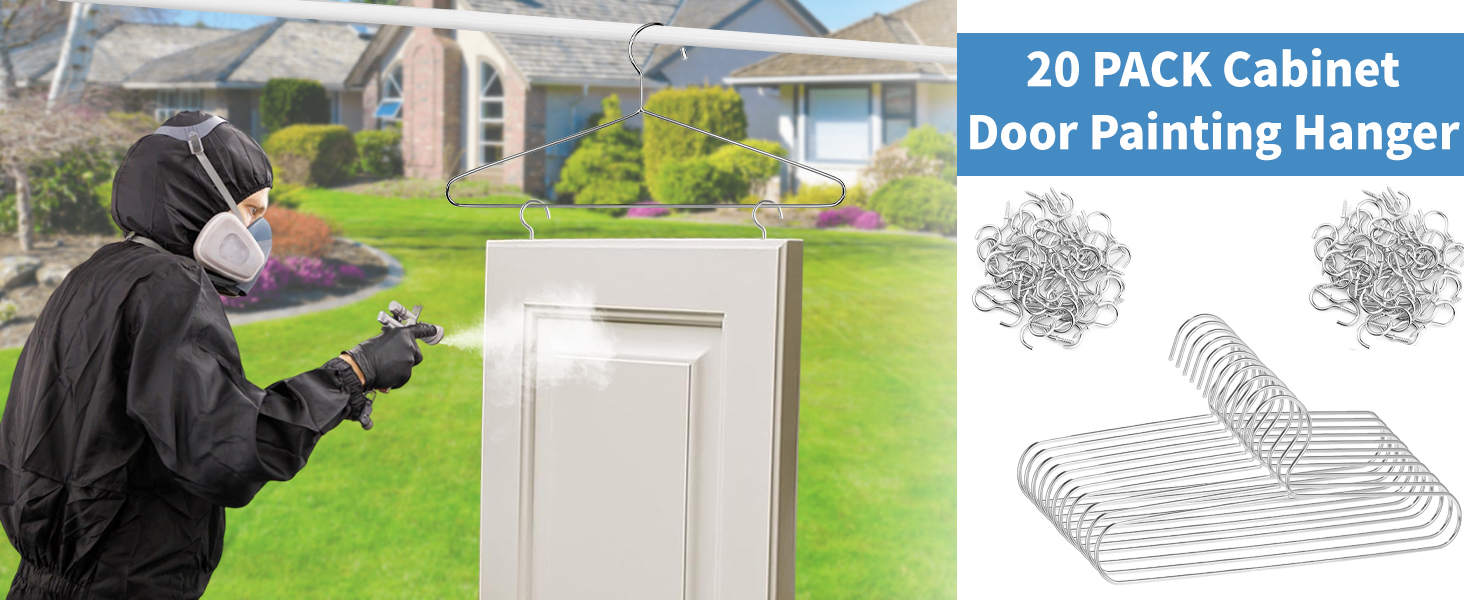
Cabinet Door Painting Hangers, Paint Drying Racks, and Painting Brackets: A Smarter Way to Finish Cabinets
Painting cabinet doors can turn a small workshop into a crowded maze of wet panels, leaning boards, and half-dry edges. Whether you are a professional refinisher or a serious DIY homeowner, the finishing stage is often the slowest part of the job. Cabinet door painting hangers, paint drying racks, and painting brackets are simple tools that solve this problem by keeping doors suspended, separated, and easy to rotate while the finish cures.
Instead of balancing cabinet doors against walls or laying them flat on sawhorses, these accessories create a controlled drying system. The result is a cleaner workspace, fewer marks in the finish, and a faster path from primer to final coat.
Why Cabinet Doors Need a Dedicated Drying System
Cabinet doors are awkward. They are flat on one side, detailed on the other, and often have recessed panels, raised edges, or drilled holes for hinges. When you paint them, every contact point becomes a risk. A door laid flat can stick to the surface beneath it. A door leaned against a wall can slide, scratch, or collect dust along its bottom edge.
Good drying support is not a luxury—it is part of a quality finish. A proper hanger or rack lets air reach both faces and all edges. That means faster curing, fewer drips, and less chance of paint bridging over details. For anyone finishing multiple doors at once, the difference is dramatic.
Rule of thumb: If a wet cabinet door is touching anything except its dedicated hanger or bracket, it is probably drying unevenly.
Cabinet Door Painting Hangers: Suspension That Works
A cabinet door painting hanger is designed to hold a door securely while keeping its painted surfaces exposed. Many models use a simple hook, bar, or clamp system that fits into hinge holes or grips the door edge. Once mounted, the door can be hung from a rack, a line, or a dedicated stand.
The biggest advantage is 360-degree access. You can paint one side, let it flash off, then rotate the door to reach the other side without laying it down. This is especially useful for shaker-style doors, raised-panel doors, and doors with detailed moldings. Hangers also keep doors at a consistent height, which makes spraying or hand-painting more comfortable.
- Less handling: Reduce fingerprints, smudges, and accidental contact.
- Better airflow: Air moves around the entire door, not just the top face.
- More space: Hang doors vertically instead of spreading them across the floor.
Paint Drying Racks: Organize the Chaos
A paint drying rack turns a cluttered finishing area into a workable production line. These racks usually feature multiple tiers, arms, or shelves where cabinet doors, drawer fronts, and trim pieces can rest while they cure. Some are mobile, some are wall-mounted, and some are designed for spray booths or small garages.
The best racks share a few traits: sturdy construction, adjustable spacing, and easy loading. If you are painting a full kitchen, a multi-door rack can hold several pieces at once without them touching. That means you can apply a coat to one door, move to the next, and let the rack do the waiting.
Practical tip: Look for a rack that fits your largest door and your smallest drawer front. Adjustable arms or brackets make it far more versatile than a fixed-size unit.
Painting Brackets: Small Tools, Big Control
Painting brackets are the supporting players that make hangers and racks more effective. They can hold doors at an angle, lift panels off a surface, or create a stable contact point that minimizes paint transfer. Some brackets are designed to fit into hinge holes; others clamp onto edges or support drawer fronts on a bench.
When choosing painting brackets, focus on stability and finish safety. A bracket should grip firmly without crushing wood or leaving deep marks. It should also be easy to clean, because dried paint can build up and interfere with a secure fit. For spray finishing, non-marring brackets are especially valuable.
How to Set Up a Simple Cabinet Finishing Station
- Prepare the space: Clear a dedicated area with good ventilation and dust control.
- Mount the rack or hanger: Position it at a comfortable working height.
- Attach cabinet door painting hangers: Secure each door so both faces are exposed.
- Use painting brackets: Support drawer fronts and small pieces that cannot hang.
- Load the paint drying rack: Keep doors separated and allow air to circulate.
- Rotate and inspect: Check edges and details for drips before the finish sets.
Common Mistakes to Avoid
Even with good equipment, small errors can ruin a smooth finish. Avoid overloading a rack, hanging doors too close together, or using brackets that leave hard contact points. Do not move wet doors more than necessary, and keep the drying area free of dust, pets, and foot traffic.
Also, remember that airflow matters more than heat. A warm, dusty room can cause more problems than a cool, clean one. Let the paint or finish cure according to the product instructions, and do not rush the reassembly stage.
Final Thoughts
Cabinet door painting hangers, paint drying racks, and painting brackets are small investments that bring order to a messy finishing process. They protect wet surfaces, improve airflow, and make it easier to paint both sides of a door without constant handling. For professionals, they increase throughput. For DIYers, they make a difficult project feel far more manageable.
If you want cleaner edges, fewer touch-ups, and a more professional result, build your finishing setup around these three tools. A well-organized drying station may not be the most glamorous part of cabinet painting, but it is often the difference between a good finish and a great one.